Picture this: you’ve just enjoyed the most romantic dinner by candlelight, and as you’re clearing the table, you notice that stubborn blob of wax has somehow found its way onto your favorite tablecloth. Your heart sinks as you imagine scrubbing endlessly, potentially ruining the delicate fabric forever. But what if I told you that our grandmothers had a foolproof solution that requires no aggressive scrubbing and leaves your textiles completely unharmed?
The secret lies in a technique passed down through generations, one That Works with the physics of wax rather than fighting against it. This method is so elegantly simple-trick-under-the-covers-the-life-changing”>Simple-trick-under-the-covers-the-life-changing”>Simple-trick-under-the-covers-the-life-changing”>Simple-trick-under-the-covers-the-life-changing”>Simple-scarf”>Simple-jar-trick”>Simple that once you learn it, you’ll wonder why you ever tortured yourself with futile scraping and harsh chemicals.
The Science Behind the Magic
Before diving into the technique, it’s essential to Understand Why traditional approaches often fail. When Candle Wax hardens on fabric, it doesn’t just sit on the surface – it penetrates the fibers, creating a bond that becomes stronger the more you try to force it out. Scrubbing only pushes the wax deeper and can damage the delicate weave of your textiles.
The ancestral method works on a completely different principle: controlled remelting. By carefully reheating the wax to its liquid state while simultaneously providing an absorption medium, you can coax it out of the fabric fibers Without any mechanical stress. This approach respects both the integrity of your textiles and the natural behavior of the wax itself.
What makes this technique particularly brilliant is its gentleness. Unlike modern chemical solvents that can strip color or weaken fibers, this method uses only heat and absorbent materials – resources that were readily available to Our Ancestors and remain accessible today.
The Time-Tested Removal Technique
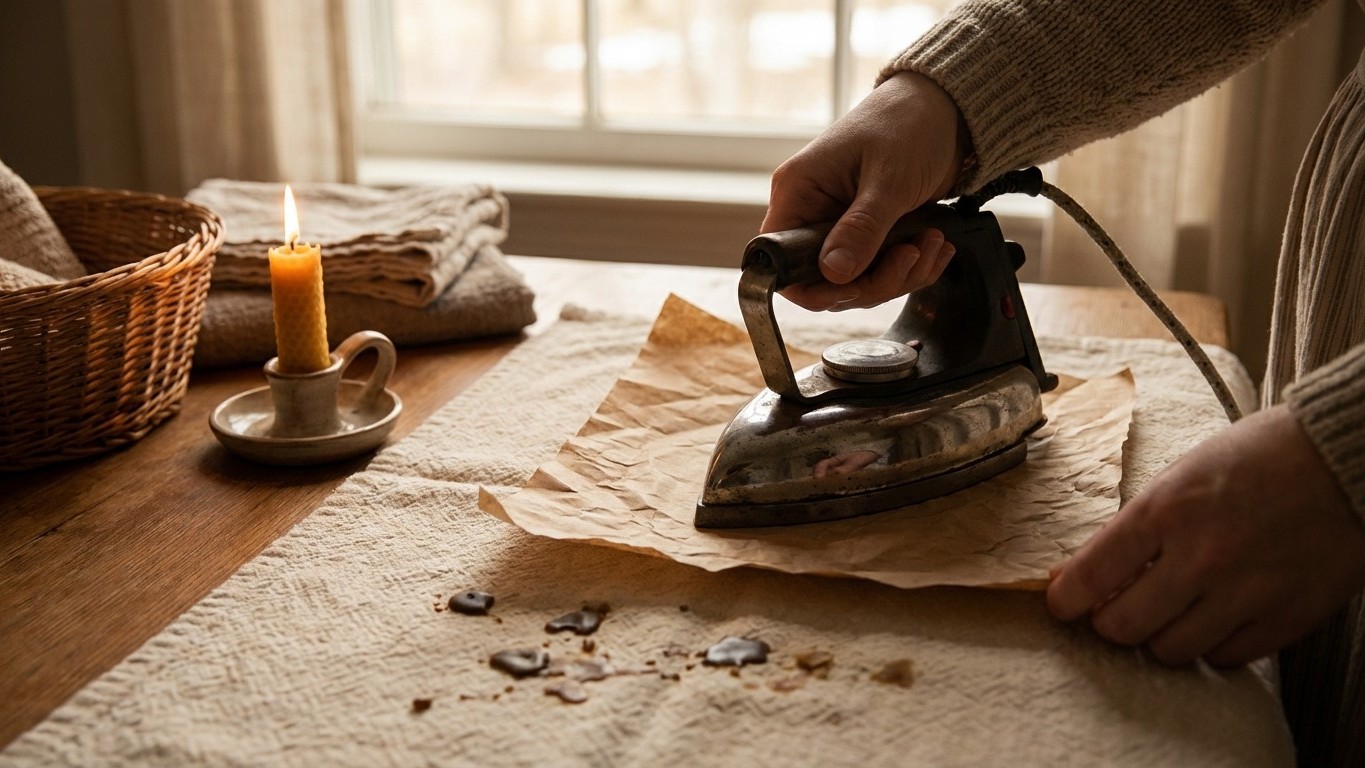
The magic begins with two household items you likely already own: a warm iron and absorbent paper. Brown paper bags work exceptionally well, but parchment paper or even plain paper towels can serve as effective alternatives. The key is choosing materials that can withstand moderate heat without melting or transferring ink.
Start by allowing any excess wax to harden completely – resist the urge to scrape while it’s still warm, as this will only spread the problem. Once hardened, gently remove any surface wax that can be lifted without pulling at the fabric. This preliminary step reduces the amount of wax that needs to be absorbed later.
Place your stained fabric on a flat, heat-resistant surface. Position a sheet of your chosen absorbent paper directly over the wax stain, ensuring it covers the entire affected area with some overlap. Set your iron to a medium heat setting – hot enough to melt wax but not so intense that it damages your fabric or paper.
Here comes the magical moment: gently press the warm iron over the paper-covered stain for just a few seconds. You’ll immediately see the paper beginning to absorb the melted wax as it liquefies beneath the heat. Move the iron in small, overlapping motions, allowing the paper to draw out every trace of wax from the fabric fibers.
As the paper becomes saturated with absorbed wax, replace it with a fresh sheet and repeat the process. You’ll be amazed at how much wax emerges with each application. Continue until no more wax transfers to the paper – this usually takes three to four cycles, depending on the size and thickness of the original stain.
Perfecting the Process for Different Fabrics
While the basic technique remains consistent, different fabric types may require slight adjustments to achieve optimal results. Delicate materials like silk or vintage lace benefit from using the iron on its lowest effective setting and working in shorter intervals to prevent heat damage. For these precious textiles, place a thin cotton cloth between the iron and the absorbent paper for an extra layer of protection.
Cotton and linen, being more robust, can typically handle slightly higher heat settings, which often makes the removal process faster and more thorough. Synthetic fabrics require careful attention to heat levels, as many can melt or deform under excessive temperature. When in doubt, start with lower heat and gradually increase if needed.
For colored fabrics, particularly those with vibrant dyes, test the heat setting on an inconspicuous area first. While this method is remarkably gentle, it’s Always-wore-the-same-one-this-lipstick-mistake-makeup-artists-fix-first”>Always wise to ensure your specific fabric responds well to the treatment before proceeding with the visible stained area.
Beyond the Basics: Advanced Tips and Final Touches
Sometimes, particularly with older stains or heavily textured fabrics, a faint residue may remain after the initial treatment. Don’t despair – a gentle wash with your regular detergent will typically remove any lingering traces. For washable items, this final step ensures your fabric returns to its original pristine condition.
If you’re dealing with a garment that requires dry cleaning, inform your cleaner about the wax removal treatment you’ve performed. They’ll appreciate knowing that the bulk of the wax has been removed and can apply their finishing techniques more effectively.
This Ancient wisdom proves that sometimes the most effective solutions are also the simplest. By working with natural principles rather than against them, you can rescue your cherished textiles from what seems like permanent damage. The next time candle wax threatens your favorite fabrics, you’ll approach the situation with confidence, knowing you possess a technique that has saved countless textiles across generations. Your grandmother would be proud to see this timeless knowledge Living on, continuing to solve modern problems with old-fashioned ingenuity.